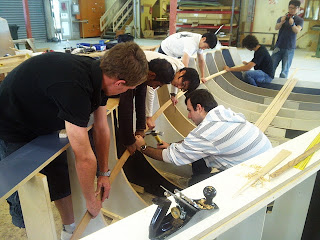
Strip Planking
This process took us two weeks to complete. We used Western-red Cedar for the strip planking and cut them to 8mm thickness. The first two strips of planks was laid down on the frames symmetrically and joined on the centerline and tapered at the bow going past station 0. The rest of the planks where laid down in the same fashion by marking out the required angle and cutting to that line and fitting a few planks in place before gluing up with resin mixed with glue powder. It needs to fit tightly so we don’t need to fill as much so a few shots with a plane gave us the tight fit we wanted. After the planks are glued up and fitted symmetrically it is pinned down with a lofting nail to keep it in place and allow for the resin to cure. As we worked our way up and closer to the chine plank it got tricky. There is too much twist and tension in the planks that we had to make cuts in the plank at the bow end splitting the plank in three to allow it to twist easier.
Once we were done strip planking the hull all the way up to the chine we had to sand off all the excess resin and make the inner skin smooth using pneumatic round sanders. Once the sanding was done all the nail holes and cracks needed to be back filled before we could put on the sealer coat and much later the fiberglass.


A good overview on strip planking
ReplyDelete