Reflection on TTEC 3000
being assigned to this diverse group to do a group assignment was a good experience with good learning outcomes. everyone did their part and communicated with each other. we get along and like working together.
Saturday, July 9, 2011
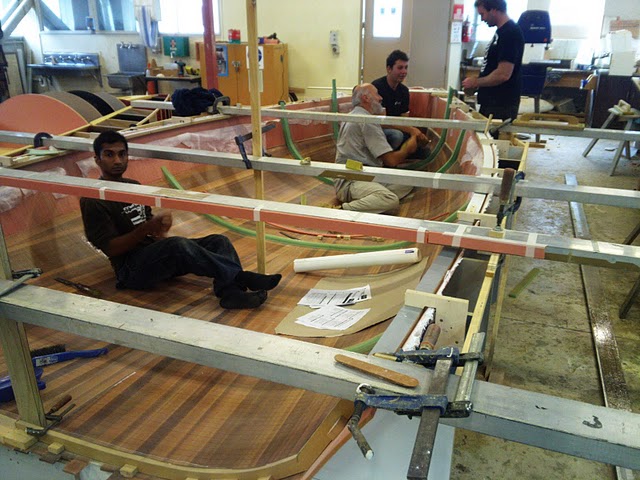
Composite Manual
This manual is for laminating the girder
underneath the cockpit sole of the Shaw 550. The girder runs on the centerline of
the boat from the transom to the centre case. The girder is made of 8mm thick foam
with a density of 80 and needs fiberglass on both sides and this manual will
explain the stack and the steps on how to laminate the girder.
What you would need to laminate the
girder:
·
Space to
work in
·
A clean
surface to laminate and vacuum on
·
Containers
to mix the resin in
·
Some latex
gloves
·
respirator
·
Mixing sticks
·
Brushes
·
Squeegees
·
Z105 epoxy
and hardener
·
Vacuum bag
·
Vacuum tape
·
Vacuum pump
·
Mesh
·
Perforated
plastic
·
Peel-ply
·
EDB 240
fiberglass
Steps:
1.
Make the
girder to fit and it is always a good thing to leave it longer. You can always
take more off but you can’t put it back. Make sure the surface of the foam is
clean and dust free without any nibs on it. You wouldn’t want anything under
your laminate that could cause delaminating or damage the fibers.
2.
Find a
space to work in and a clean smooth surface that won’t affect your vacuum
3.
Both surfaces
needs to be fiberglassed so everything can be cut twice. The fiberglass,
peel-ply, perforated plastic and mesh needs to be cut to size and can be bigger
than the girder itself and be cut off later when the resin has cured.
4.
The stack
will be as the following: mesh ,perforated plastic, peel-ply, fiberglass,
girder, fiberglass, peel-ply, perforated
plastic, mesh and then the vacuum bag over the layers on top. In order for the
stack to be laid out the girder needs to be glassed first with resin.
5.
Wear your
respirator and latex gloves when mixing up some resin with 4:1 ratio of resin
to hardener and mix with a mixing stick for about 2minutes until the resin and
hardener is fully mixed up.
6.
Apply resin
to the girder by brushing it on or just pour some out of the container and spread
it out with a squeegee to enable the
resin to saturate all the pores of the foam. Now the fiberglass can be laid on
the girder and then soaked in resin or it could be presoaked out with resin and then laid over the girder. Make
sure all the fibers are wet and there is no bubbles under the glass by using
your brush or squeegee . (do both sides)
7.
Peel-ply
can be laid over the glass and worked
out smoothly with a squeegee to make sure the glass is work out flat to take
the shape of the peel-ply. (do both sides)
8.
Now the girder
which is glassed and with peel ply on both sides can be laid on the stack which is the mesh and
perforated plastic. Then on top of that the other piece of perforated plastic
can be laid on and the mesh.
9.
Vacuum tape
can be stuck down around the girder and make sure it is nowhere near the wet
resin because it will not stick
10.
The vacuum
bag can be laid over the stack and start
sealing it to the vacuum tape. Also make ‘darts’ in the bag to allow the bag to
expand if it needs to but for the girder it is not really necessary because it
is flat. Make sure you have plenty of bag. It is always good toe have to much
than too little.
11.
Once the
vacuum pipe is sealed in and the bag is sealed up to the vacuum tape, the
vacuum pump can be turned on. Once the air is being sucked out of the bag it is
possible to find leaks so you should listen carefully by putting your ear close
to the bag to listen for leaks. Find them and close them to get a good vacuum.
12.
Once there
is a tight vacuum and silence with no air escaping into the bag your job will
be complete and leave your composite laminate over night for the resin to cure
13.
When the
laminate is cured the bag and plastic can be removed with all the excess resin
squashed out onto it and the peel-ply can be removed to show the smooth
laminated component


Thursday, July 7, 2011
Stack of the Deck
The Stack of the Deck
The glassing of the deck and hull are considerably different from each other. The resin we used for the deck is APR and APH (the resin and hardener) and is mixed to a 1:4 ratio. This epoxy has a slower curing time which benefits us because we have a longer pot-life then the WEST Z205 resin we used for the hull. We could work longer on getting the glass and peel-ply down to work out the bubbles and creases created on the deck and everything else that is needed to vacuum. The stack for the deck is different from the stack for the hull. The stack for the hull was only EDB400 fiberglass (double-bias fiberglass with the directions of the fibers crossing at 45 degrees. The 400 is the weight of the cloth in grams per square meter) and the peel-ply with epoxy. The deck and the girders and floors needed to be vacuumed. To vacuum we stacked the layers in the following order: the deck is pre-saturated with resin to ensure all pores are filled and the glass is laid on top of the deck and then the fiberglass is soaked in resin. The peel-ply is laid on top of the glass and ensures the glass is not contaminated and also helps with forming the glass and soaks up any excess resin. Perforated plastic is laid on top of the peel-ply cloth to ensure excess resin escapes through. Mesh is laid on top of the perforated plastic and it ensures that air flows through freely for all the air to escape to ensure a vacuum. The final layer is a big piece of plastic with no holes. Vacuum tape is thick and sticky tape that is put all around the edges of the deck for the seal. It is important to leave enough space between the wet glass and the tape because the tape won’t stick. There should be plenty of plastic when the plastic is stuck on the vacuum tape to eliminate spanning if the plastic is pulled down on the deck and we made enough “darts” to ensure spanning does not happen. It is ideal for the plastic to be sucked down and take form of the deck to ensure the glass is pressed down to the deck and in all corners and edges. The vacuum pipe is sealed inside the plastic. After the vacuum was turned on we sealed off any leaks or holes we could find by feeling or listening to ensure there is no air leaking into the bag. We had a gauge set up to see that there is indeed a vacuum.


Transom, Flanges, Floors and Girder
There was some contemplating on where to attach the transom. On the deck or the hull. It was decided that it would be best to attach it to the deck. This however meant that the 15th frame needed to be moved forward by the thickness of the transom, glass and resin. This wasn’t a major issue. We also had to figure out the shape of the transom. Chris showed us a few simple methods by using a flat piece of wood or board and a scribing tool to make point on it and transferring the point and connecting them with a batten. We used the same method for the collision bulkhead. After we got the exact shape of the transom we cut it out of foam and glued it to the deck.
The flanges we made ran along the deckline from the bulkhead aft down from the topside 15mm which is the thickness of the deck and down where the transom gets attached to the flange. There is another flange running on top of the girder to which the cockpit sole will be attaching to. I made blocks which I screwed on the frames which was hanging over the topsides at the correct angle of the deck camber, which I got using my sliding bevel and bevel board, to which a long piece of MDF runs along the deck line 16mm down from the topside. The MDF was scribed and cut out to the shape of the deck and cut 50mm wide. The flange is EDB 100mm glass tape. This meant that 50mm of the tape will be on the topside and 50mm on the underside of the MDF which is set on the angle of the deck camber. Before the flange was made a piece of double sided tape was stuck to the underside of the MDF and the peel-ply was stuck to it. Then we made a cove on the inside to glass over it and peelply. Once done the resin cured the peel-ply and blocks were removed and the flanges were sanded smooth.
The Girder where made out of foam and was glassed both sides with the vacuum. The girder runs down the centre of the boat from the transom to the centrecase and it’s glued in and coved with rubberized-epoxy. It also keeps the cockpit-sole up in place and also gives the boat and cockpit more stiffness. There is a flange on the top of the girder which the cockpit sole will be glued to once the deck is fitted to the hull.
The floors are strips of foam which is hot-glued to the hull to keep the shape of it and the edges are rounded out and coved for glassing. There is a strip of carbonfibre uni as wide as the foam running on top of the foam and the fiberglass is glassed over the carbonfibre and the foam. The strips of foam runs athwart ship (across the beam) of the boat. The floors holds the shape and stiffens up any flexibility the boat might encounter in the water when hitting the waves. There is also a stack on the floors because it is vacuumed on the hull


Foam Deck
Foam Deck
We started on the deck by making the cockpit sole. The entire deck is made of foam and because it needed to be vacuumed for glassing we couldn’t put any holes in it. The deck didn’t take long because it is all big pieces of foam laid out on the deck. Most pieces of the deck was scribed and shaped to fit and the edges were beveled to join them up when gluing them together. The blister or cabin top was a bit tricky to do. Strips of foam were beveled and tapered to the shape of the blister and it needed to be held down when glued without putting holes in the foam
The entire deck was glassed and vacuumed down. The glass overlaps by 50mm and we had to rebate out 50mm wide for every overlap to ensure it is smooth and flat. The beam of the deck was made 50mm bigger which left us enough space to get the vacuum tape down and away from the wet resin. Along the deckline from the forward end to aft there was another rebate for when we glassed the outer skin of the hull and it could lap over the deck by 50mm.
15mm Thick Solid glass plates were made and installed on the blister where the mast will be and on the transom and hull topsides for extra strength for all the pressure and tension it’s going to need to handle. Carbon uni strips was also glassed on the bulkhead forward and aft face in exactly the same place for extra stiffness. These carbon strips run from the top of the bulkhead all the way down to the hull through the cockpit sole and disperses out. A hatch was also cut out to enable a person to get inside the boat.
Vacuuming has its benefits: it ensures the fiberglass is pressed down tightly to the deck and without spanning. It eliminates air bubbles to prevent delaminating and it gets rid of excess resin to make the surface smooth. It is a fairly simple and smart concept but can be tricky sometimes if you make mistakes and anything can happen. After a few goes and errors we quickly realized where our mistakes were and we improved our skills. After each time when the vacuum pump was turned on it was time to listen for any air escaping into the bag or holes in the bag and seal them up with some vacuum tape until there is complete silence and the pressure gauge shows we have a vacuum!


Subscribe to:
Posts (Atom)